

This guide will show you how to whip up delicious brookies using brownie mix and cookie dough, making for an effortless yet irresistible treat. By using simple ingredients and techniques, you can whip up this crowd-pleaser in no time!
Table of Contents
The Key to Making Flawless Brookies with Brownie Mix and Cookie Dough
Why Brownie and Cookie Dough Textures Make the Perfect Pair
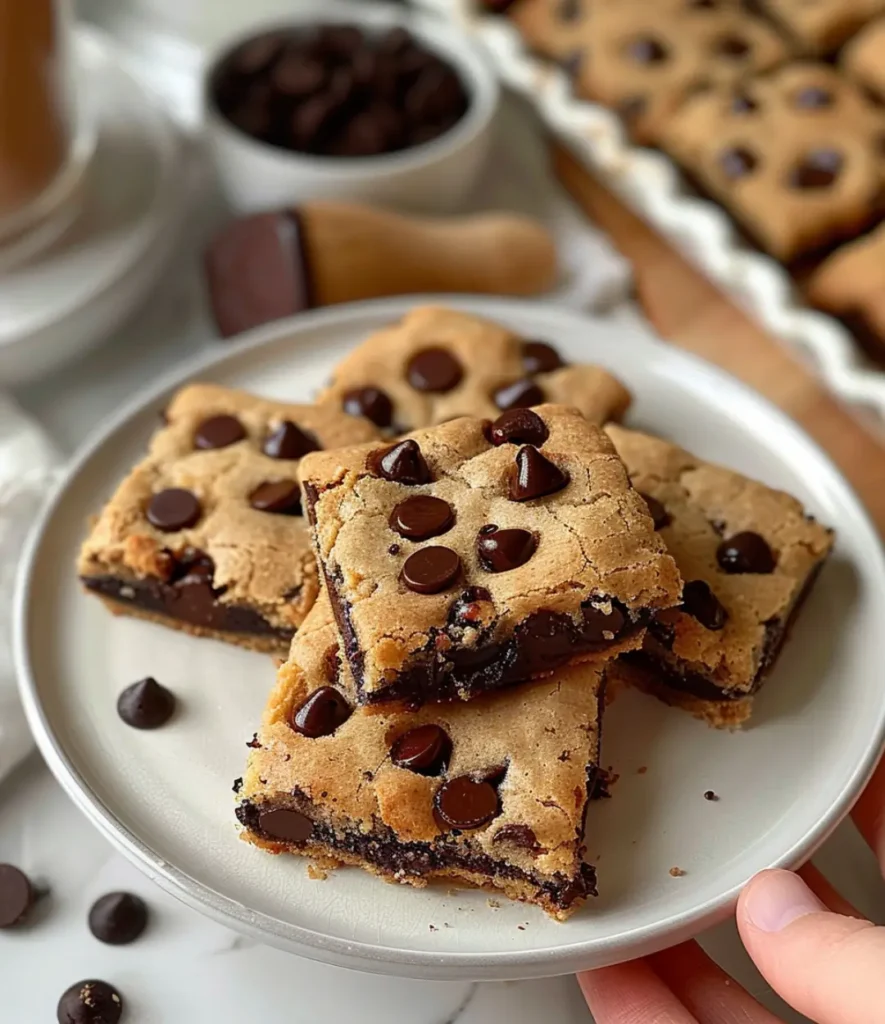
The charm of brookies comes from the fusion of two unique textures, blending perfectly to deliver a truly indulgent dessert experience.Each bite is a perfect balance between the dense, fudgy brownie and the soft, chewy cookie. As a result, this contrast is what makes brookies so irresistible.
Brownies are rich and chocolatey, with a slightly firm top and a gooey, melt-in-your-mouth center. The rich flavor provides an ideal base for brookies, offering a delicious and sturdy foundation that ties the whole treat together.
In contrast, cookie dough brings a buttery sweetness that perfectly complements the rich brownie layer.. Its softer texture and slightly crispy edges balance the density of the brownie, giving each bite a playful contrast. The cookie dough also brings in different flavor notes, like vanilla or chocolate chips, enhancing the overall taste.
As they bake, the two layers blend slightly, bonding together while still maintaining their distinct textures and flavors. The brownie layer stays rich and moist, while the cookie layer bakes to a golden perfection, resulting in a beautifully layered and irresistible dessert.
The secret to achieving this perfect harmony lies in timing.Since brownies need more time to bake than cookies, it’s important to adjust the oven temperature and baking time for the perfect balance. This ensures both layers bake evenly without overcooking or drying out. It’s this careful balance of flavors and textures that makes brookies so special!
Ingredients with a Twist
Fun Add-Ins to Enhance Your Brookies with Brownie Mix and Cookie Dough
Incorporating creative ingredients into your brookies can take their flavor and texture to the next level, making them even more tempting. Here are some ideas to try:
1. Sweet and Gooey Add-Ins
Enhance the sweetness of your brookies by adding marshmallows, caramel chunks, or butterscotch chips. These ingredients melt beautifully during baking, creating gooey pockets of flavor that complement the rich brownie and chewy cookie layers. Mini marshmallows or caramel drizzle on top can add an extra touch of indulgence.
2. Crunchy and Salty Add-Ins
For a delightful crunch, mix in crushed pretzels, chopped nuts like pecans or walnuts, or even potato chips. The salty elements perfectly offset the brookies’ sweetness, creating a well-balanced flavor that truly shines.
3. Fruity or Flavored Add-Ins
To add a fruity twist, try dried cranberries, cherries, or raisins. These additions bring a tangy contrast to the brookie’s rich, indulgent layers. Alternatively, experiment with flavored chips such as white chocolate, mint chocolate, or peanut butter for a creative twist.
How to Incorporate Add-Ins
Whether folded into the brownie batter, stirred into the cookie dough, or sprinkled on top before baking, these unique add-ins can elevate a basic brookie recipe into something truly special. Just be sure not to overload the batter to maintain the perfect balance of textures.
Creative Equipment Substitutes
Muffin Tins or Molds for Bite-Sized Brookies
You don’t need a traditional baking pan to whip up a batch of delicious brookies. In fact, using creative substitutes like muffin tins or silicone molds can add a fun twist to your dessert. These options not only address the challenge of lacking specific tools but also provide creative ways to showcase your brookies.
1. Muffin Tins for Individual Servings
Muffin tins are perfect for creating individual, bite-sized brookies. The wells of a muffin tin naturally portion out the batter, making them easy to serve and share. Plus, the edges of the brookies get delightfully crispy, while the centers stay soft and gooey.
How to Use Muffin Tins:
- Grease the muffin tin wells or line them with cupcake liners to prevent sticking.
- Scoop a small amount of brownie mix into the bottom of each well, followed by a dollop of cookie dough on top.
- Follow the regular baking process, but shorten the baking time a bit to avoid overbaking. Start checking for doneness after about 12-15 minutes.
2. Silicone Molds for Fun Shapes
Silicone molds come in all shapes and sizes, from hearts to stars to classic squares. Using them can turn your brookies into eye-catching treats, perfect for parties or themed events. Silicone molds are also non-stick and flexible, making it easy to pop out the brookies once they’re cooled.
How to Use Silicone Molds:
- Even with non-stick molds, apply a light coating of grease to ensure the brookies release effortlessly.
- Layer the brownie mix and cookie dough as usual, filling each mold about three-quarters full to allow room for the batter to rise.
- For added stability, set the molds on a solid baking sheet before placing them in the oven.
3. Cupcake Liners as a Standalone Option
If you don’t have a baking pan or muffin tin, you can use sturdy cupcake liners placed on a flat baking sheet. These work similarly to muffin tins but allow more flexibility. They’re an ideal choice for baking brookies in small or limited kitchen spaces.
Why Try These Substitutes?
Portion Control: Smaller servings help avoid the temptation of cutting oversized slices.
- Presentation Tip: Using fun shapes or creating bite-sized brookies enhances their visual appeal and makes them simpler to serve.
- Versatility: These methods are great for experimenting with add-ins or layering different flavors.
By thinking outside the box and using these creative substitutes, you can make brookies in any shape or size you desire. Whether you’re throwing a party or simply in the mood for something sweet, these tips guarantee you won’t have to miss out on dessert because of missing tools!
Layering Secrets for a Stunning Brookie
Techniques for Creating Distinct Layers
The beauty of a brookie lies in its distinct layers of brownie and cookie dough. Achieving this balance requires some simple techniques to ensure the layers remain defined while still baking into a cohesive dessert.
1. Start with a Greased or Lined Pan
Always prepare your baking dish by greasing it with butter or lining it with parchment paper. This ensures the layers don’t stick to the pan, making it easier to achieve clean, sharp edges when slicing.
2. Spread the Brownie Mix Evenly
Pour the brownie mix into the prepared pan and spread it evenly with a spatula. If the batter is thick, you can use the back of a spoon or a spatula dipped in water to smooth it out. This creates a firm foundation for the cookie layer.
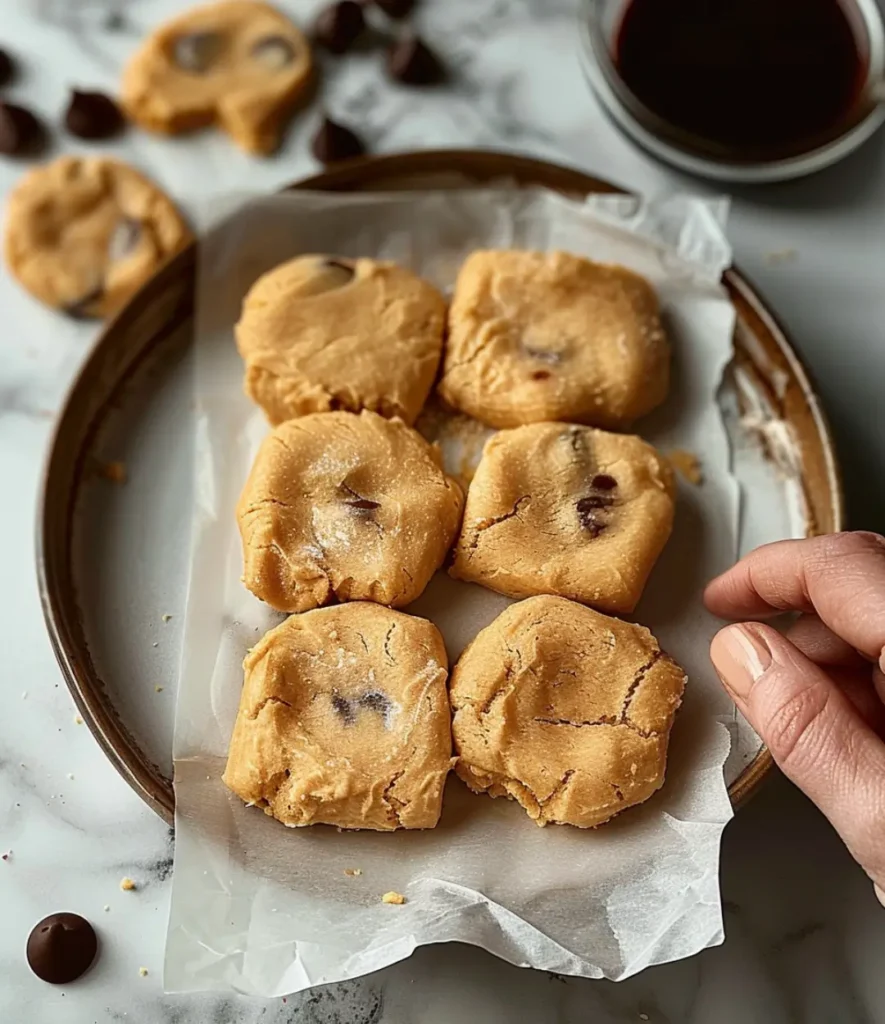
3. Chill the Cookie Dough
Cold cookie dough is easier to handle and less likely to sink into the brownie layer during baking. Scoop small portions of chilled dough and gently flatten them with your hands before placing them on top of the brownie layer. This keeps the layers separate and distinct.
4. Don’t Overfill the Pan
Leave a bit of space at the top of the pan for the layers to expand as they bake. Overfilling can cause the cookie layer to overflow or the brownie layer to compress, making the layers blend too much.
How to Swirl Brownie and Cookie Layers
For a fun and marbled effect, you can swirl the brownie and cookie layers together. This method blends the two batters while maintaining their unique flavors.
1. Drop Spoonfuls of Cookie Dough on the Brownie Layer
After spreading the brownie mix, drop small dollops of cookie dough randomly across the surface. Make sure the dollops are evenly spaced for a balanced swirl.
2. Use a Knife or Skewer to Swirl
Take a knife, skewer, or even the back of a spoon, and gently swirl the two layers together. Move the tool in figure-eight patterns or loops to create a marbled effect. Avoid over-mixing, as this can blur the layers too much.
3. Adjust for Your Desired Look
If you prefer a more distinct swirl, make fewer and larger swirls. For a more integrated marbled appearance, create smaller, tighter swirls.
⭐ Pro Tips for Layering Success
- Work Quickly: If the brownie mix is too runny, it can blend into the cookie dough. Swirl or layer immediately after preparing the batters.
- Bake at the Right Temperature: Baking at a consistent temperature prevents the layers from melting into each other.
- Cool Before Slicing: Allow the brookies to cool completely before cutting to prevent the layers from smudging.
Whether you prefer clean layers or a marbled effect, these layering secrets ensure your brookies look as good as they taste. With a little practice, you’ll be able to create stunning brookies that are Instagram-worthy and deliciously satisfying!
Baking Hacks for the Best Results
Using Parchment Paper for Easy Removal
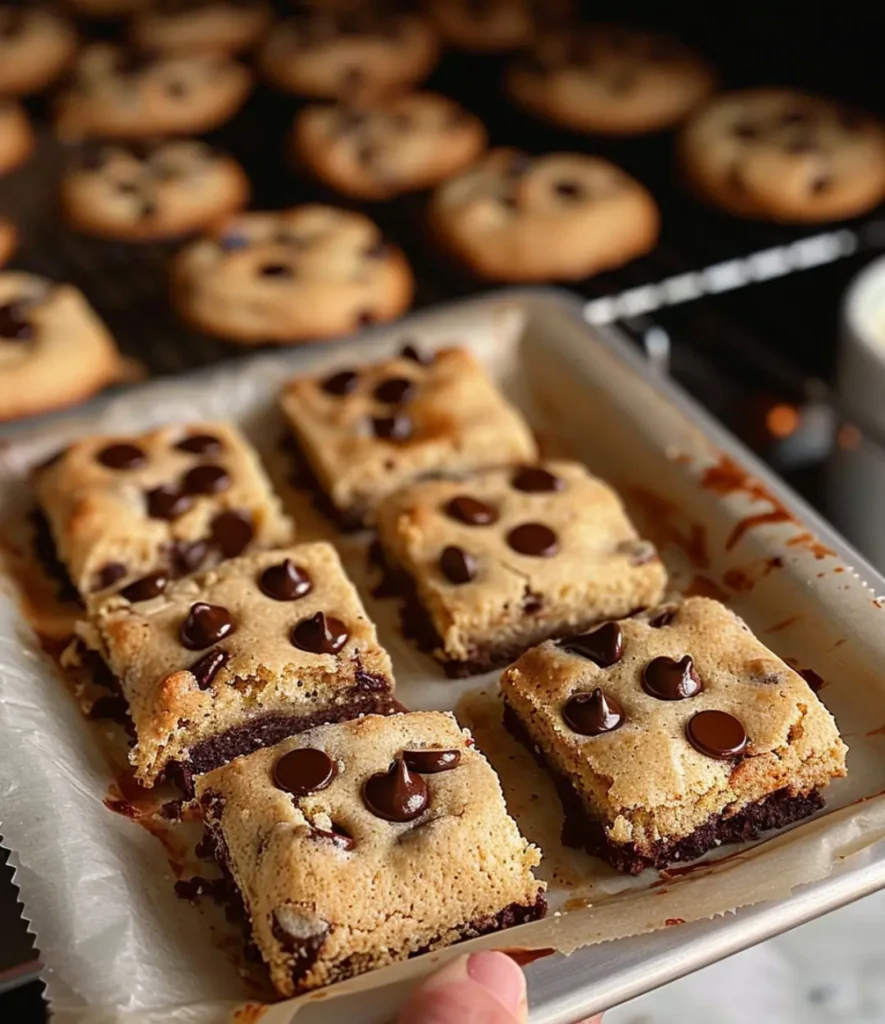
One of the simplest tricks for making brookies is to use parchment paper to line your baking pan. This hack not only prevents sticking but also makes removing the brookies a breeze. Cut the parchment paper slightly larger than your pan, allowing the edges to hang over the sides. These overhanging edges act as handles, letting you lift the entire brookie slab out of the pan once it cools. This method is especially helpful if you want clean, sharp edges when slicing your brookies. For added security, lightly grease the parchment paper before pouring in the brownie batter.
Monitoring Browning to Avoid Burning
Brookies can be tricky to bake since the brownie and cookie layers have different textures and bake times. Keep a close eye on your brookies, especially during the last 5-10 minutes of baking. A good rule of thumb is to test for doneness by inserting a toothpick into the center. If it comes out with a few moist crumbs, they’re ready. Overbaking can result in a dry cookie layer or an overly firm brownie base. To ensure even baking, use an oven thermometer to verify the temperature and rotate the pan halfway through baking. If the top starts to brown too quickly, loosely cover it with aluminum foil to prevent burning while allowing the center to finish baking.
By using parchment paper and carefully monitoring browning, you’ll achieve brookies that are not only easy to handle but also perfectly baked every time. These simple hacks ensure a hassle-free baking experience and a dessert that’s deliciously satisfying!
Alternative Methods for Making Brookies with Brownie Mix and Cookie Dough
Making Brookies in an Air Fryer or Microwave for Small Batches
If you’re craving brookies but don’t want to make a full batch or use a conventional oven, alternative baking methods like an air fryer or microwave are excellent options. These methods are quicker, more energy-efficient, and perfect for small portions.
Air Fryer: The air fryer is a surprisingly effective way to bake brookies. Its rapid circulation of hot air ensures even baking with a crisp top and gooey center. To make brookies in an air fryer, use small, oven-safe ramekins or silicone molds that fit inside the basket. Layer the brownie mix and cookie dough as usual, filling the molds only halfway to allow room for expansion. Preheat the air fryer to 325°F (165°C) and bake for about 12-15 minutes, checking frequently toward the end of the baking time. The result is a perfectly portioned brookie with minimal effort.
Microwave: For the fastest option, the microwave is a lifesaver. Use a microwave-safe mug or small dish to create a single-serving brookie. Start by layering a few tablespoons of brownie mix at the bottom of the mug, followed by a dollop of cookie dough on top. Microwave on high for 1-2 minutes, depending on the power of your microwave, checking for doneness after the first minute. The brookie will puff up as it cooks and settle slightly once it cools. While the texture may be slightly less crisp than oven-baked brookies, the flavor remains just as delightful.
These alternative methods are ideal for satisfying a quick brookie craving or testing out different variations without committing to a large batch. Whether you’re using an air fryer or microwave, these options ensure you can enjoy brookies anytime with minimal cleanup and maximum convenience.
Fun Ways to Serve Brookies with Brownie Mix and Cookie Dough
Using Brookies as an Ice Cream Sandwich Base
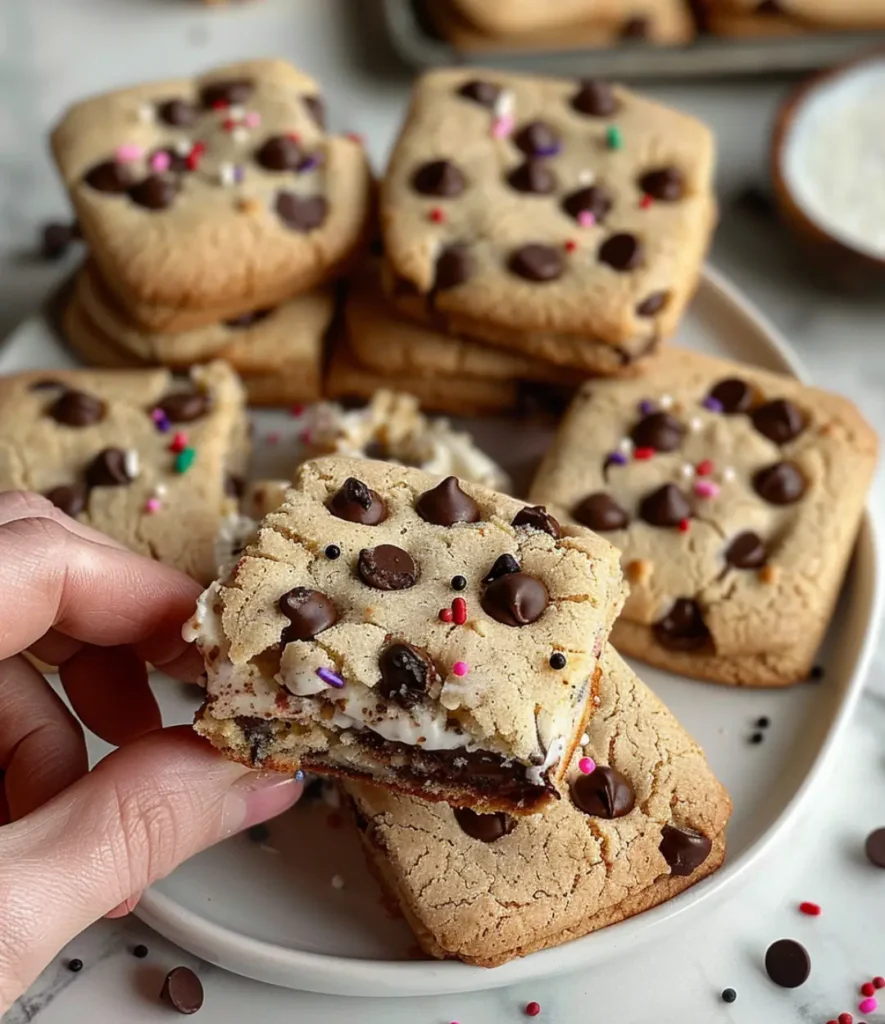
Take your brookies to the next level by transforming them into ice cream sandwiches. The chewy cookie layer and fudgy brownie base make the perfect pairing for creamy, cold ice cream. To create this treat, let the brookies cool completely and then slice them into even squares or rectangles. Add a generous scoop of your favorite ice cream flavor onto one brookie piece, then gently press another piece on top to form a sandwich. For an extra indulgent touch, roll the edges in sprinkles, mini chocolate chips, or crushed nuts. Wrap each sandwich in parchment paper and freeze for 30 minutes to firm up before serving. These brookie ice cream sandwiches are a hit at parties or as a refreshing summer dessert.
Cutting Them into Fun Shapes
Make your brookies more playful by cutting them into fun shapes. Once the brookies have cooled, use cookie cutters to create shapes like hearts, stars, or circles. This is a fantastic idea for themed celebrations or kids’ parties. To prevent sticking, dip the cookie cutter in warm water or coat it lightly with cooking spray before pressing into the brookies. The leftover scraps can be crumbled and used as a topping for ice cream, yogurt, or milkshakes, ensuring nothing goes to waste. Whether you’re making festive treats or whimsical desserts, cutting brookies into shapes adds a creative and personal touch that everyone will love.
These unique serving ideas take the humble brookie and turn it into something extraordinary. Whether you’re layering them with ice cream or turning them into edible art, these ideas add excitement to an already delicious dessert.
Kid-Friendly Brookie Projects: Decorating and Shaping Tips
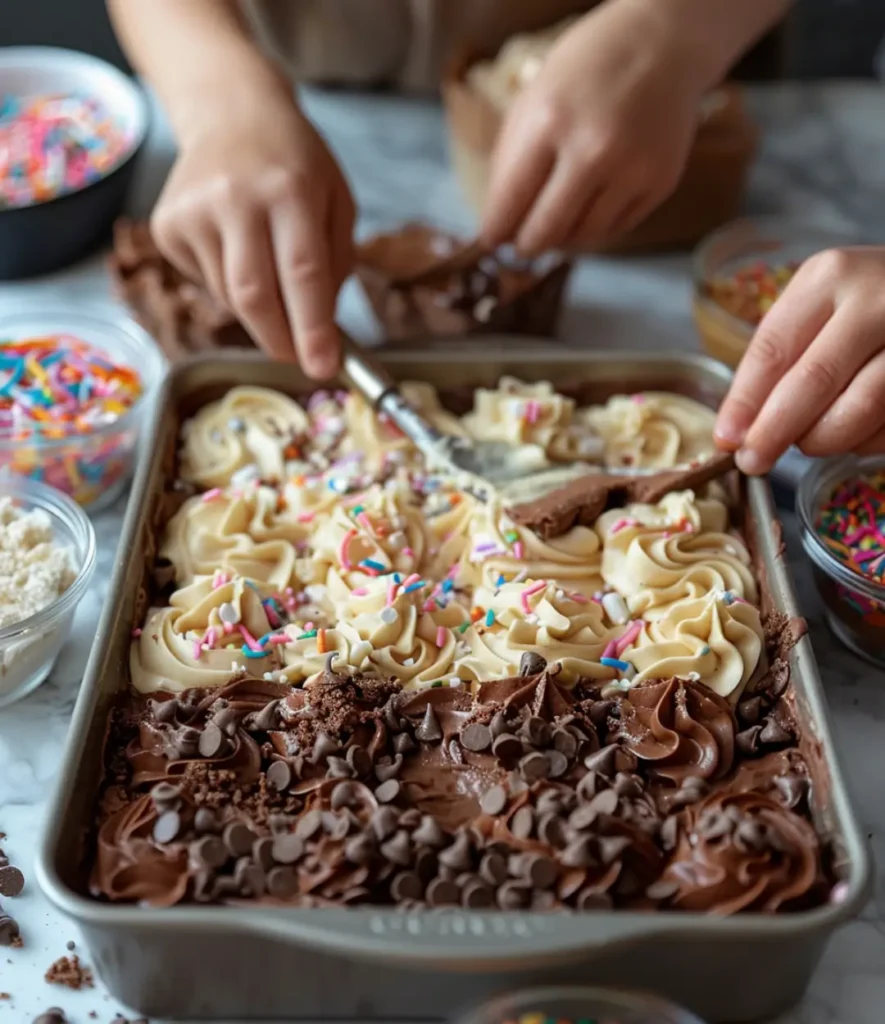
How to Involve Kids in Layering and Decorating
Making brookies is a fantastic activity to share with kids, as it’s simple, fun, and creative. Start by letting them help with layering the brownie mix and cookie dough. Give them a spoon or spatula to spread the brownie batter evenly in the pan, teaching them the importance of a good base layer. Next, let them scoop and flatten small portions of cookie dough to place on top. Kids can also experiment with swirling the layers using a butter knife or skewer, creating their own marbled designs. Once the brookies are baked and cooled, decorating becomes their favorite part. Provide toppings like sprinkles, mini marshmallows, or chocolate chips, and let their imagination run wild. This hands-on experience not only teaches basic baking skills but also encourages creativity and teamwork.
Fun Shapes with Cookie Cutters
Turning brookies into fun shapes is a surefire way to delight kids. After the brookies have cooled, hand them cookie cutters in various shapes, such as stars, hearts, or animals. Show them how to press firmly into the brookies to cut out clean shapes. To make the activity even more engaging, provide icing, edible glitter, or colored sugar for decorating the cut-outs. Kids can create personalized treats for holidays, birthdays, or just because. The leftover scraps can be snacked on or repurposed as toppings, so nothing goes to waste.
These kid-friendly brookie projects make baking a joyful experience for the whole family. By involving children in layering, decorating, and shaping, you’ll not only create delicious treats but also lasting memories.
FAQs About Making Brookies with Brownie Mix and Cookie Dough
Can I Make Brookies Ahead of Time?
Yes, brookies are a great make-ahead dessert! Prepare the batter layers in advance, assemble them in a pan, and refrigerate for up to 24 hours. Let the pan sit at room temperature for 15-20 minutes before baking to ensure even cooking. Alternatively, bake the brookies ahead, cool them completely, and store in an airtight container. They stay fresh for up to 3 days at room temperature, a week in the fridge, or can be frozen in individual portions. To enjoy later, thaw at room temperature or warm briefly in the microwave for a freshly baked taste.
How to Rescue Overbaked Brookies?
If your brookies turn out dry or overbaked, don’t worry—there are ways to save them! One quick fix is to brush the top with a light layer of simple syrup (a mixture of equal parts sugar and water heated until the sugar dissolves). This adds moisture back into the brookies without altering their flavor. Another option is to serve them warm with a scoop of ice cream or a drizzle of chocolate or caramel sauce, which can mask any dryness while enhancing the dessert’s overall richness. You can also crumble overbaked brookies and use them as a topping for yogurt, parfaits, or milkshakes. These simple tricks ensure no brookie goes to waste and that every batch remains delicious!
Explore More Brookie Inspiration and Tips
For more inspiration and tips, explore the “Brookies Guide” for a detailed overview of this versatile dessert, or check out “The Ultimate Brookie Recipe” to discover unique variations. If you’re curious about the origins of this treat, dive into the fascinating “Brookies History”, or try out the creative twists highlighted in the “Brookie Cookie Recipe”. These resources can help you master the art of making brookies and even inspire your next baking adventure.
Conclusion
Brookies are the ultimate dessert for those who love to experiment in the kitchen. Their unique combination of brownie and cookie layers opens the door to endless creativity and customization. From classic recipes to innovative twists like adding marshmallows or using fun shapes, brookies can be tailored to suit any occasion or personal taste.
The versatility of brookies extends beyond their flavors. Whether you bake them in a traditional pan, muffin tins, or silicone molds, or even try alternative methods like an air fryer or microwave, there’s always a way to enjoy this delightful treat. They’re perfect for sharing with family, wowing guests, or enjoying a quiet moment of indulgence.
Making brookies also provides an excellent opportunity to involve kids, experiment with new techniques, or explore unique serving ideas like ice cream sandwiches. Even small mishaps like overbaking can lead to new dessert creations with a bit of ingenuity.
In the end, brookies are more than just a dessert—they’re a canvas for your imagination. Whether you stick to the basics or get adventurous with add-ins and decorations, every batch of brookies is a delicious expression of your creativity. So, grab your brownie mix and cookie dough, and start baking your way to sweet perfection!