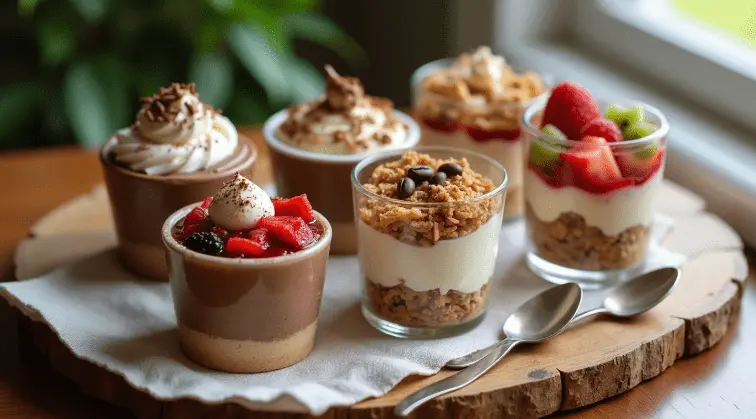
Picture this: a tiny, beautiful cup filled with layers of deliciousness, from creamy fillings to crunchy toppings, just waiting to be enjoyed. Dessert cups are more than just desserts—they’re delightful creations that turn simple ingredients into something magical. Perfect for celebrations or a cozy treat at home, they bring joy to both kids and adults with their charm and endless possibilities. Ready to discover how to make these irresistible little treats? Let’s get started!
Your Guide to Making Dessert Cups
Creating dessert cups at home is a joyful adventure filled with creativity and delicious possibilities. Whether you’re preparing for a party, surprising your loved ones, or simply indulging your sweet tooth, this guide will help you make dessert cups that look and taste incredible. With a little planning, the right tools, and simple ingredients, you’ll be ready to impress everyone with your edible creations. Let’s dive into the essentials that will set you up for success.
Must-Have Ingredients for Success
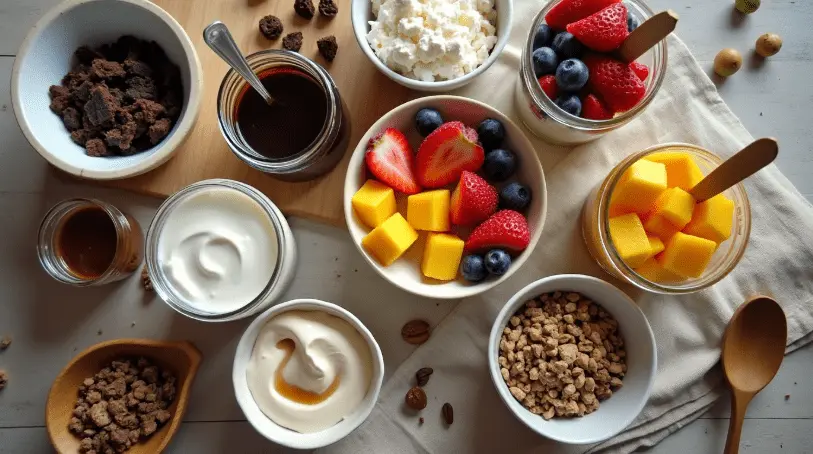
The heart of any great dessert cup lies in its ingredients. Imagine layers of fluffy whipped cream, creamy custards, and crunchy toppings coming together to create a delightful treat. To get started, here are some staples you’ll want to have on hand:
- Base Layers: Crumbled cookies, cake pieces, brownie chunks, or granola. These add texture and structure to your dessert.
- Creamy Fillings: Pudding, mousse, yogurt, or mascarpone cheese for that melt-in-your-mouth layer.
- Fresh Fruits: Berries, mango slices, or diced kiwi. They add color and a burst of freshness.
- Sweet Sauces: Chocolate syrup, caramel drizzle, or fruit coulis to enhance the flavors.
- Crunchy Toppings: Chopped nuts, sprinkles, or crushed candy bars for the final touch.
Don’t be afraid to mix and match flavors. For instance, pairing chocolate with raspberries or caramel with bananas can turn simple ingredients into something magical. If you’re accommodating dietary preferences, look for plant-based creams or gluten-free cookie bases to ensure everyone can enjoy the dessert.
Handy Tools to Get Started
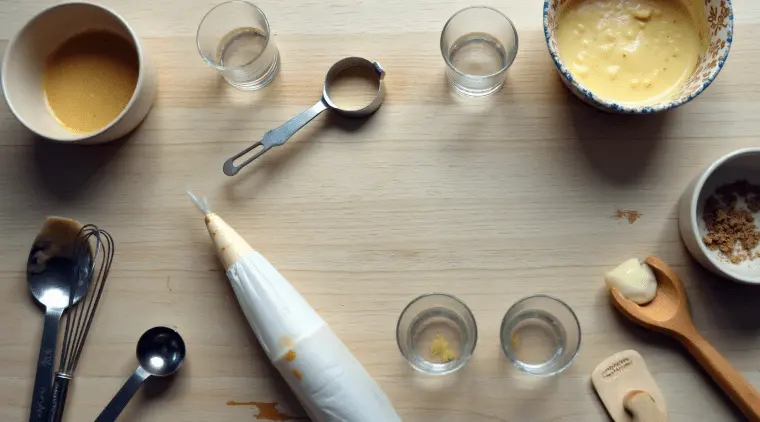
While you don’t need a professional kitchen to make dessert cups, having a few tools on hand will make the process smoother and more enjoyable. Think of these tools as your trusty sidekicks:
- Clear Cups or Glasses: Small, clear containers work best to show off those gorgeous layers.
- Spoons or Piping Bags: For layering ingredients neatly without mess.
- Mixing Bowls: Essential for preparing your fillings and sauces.
- Spatulas and Whisks: Perfect for scraping every last bit of goodness from your bowls.
- Measuring Cups and Spoons: Precision matters when balancing flavors.
These tools are not just practical; they also help you create dessert cups that look just as amazing as they taste. Even kids can join in and use these items to help layer and decorate their own cups.
Step-by-Step: Build Your Perfect Dessert Cup
Now comes the fun part—assembling your dessert cups! This process is as simple as layering your favorite ingredients, but a little guidance can turn “good” into “wow.” Follow these easy steps to build a dessert that’s a A delight for both the eyes and the palate.
- Start with the Base
Begin by adding a crunchy or cakey layer at the bottom of your cup. Crumbled cookies or cake pieces work wonderfully here. Make sure the layer is even so the next ingredients sit nicely on top. - Add a Creamy Layer
Spoon in a generous layer of pudding, mousse, or whipped cream. Smooth it out gently to create a neat line. For an extra professional touch, use a piping bag to swirl the layer. - Incorporate Fresh Fruits or Fillings
Place slices of fruit or other fillings over the creamy layer. Be artistic here—colorful fruits like strawberries and blueberries look especially inviting. - Repeat Layers
Keep layering your ingredients to build height and flavor complexity. Alternate between creamy, fruity, and crunchy layers for the best results. - Top It Off
Finish with a flourish! Add sprinkles, nuts, or a drizzle of sauce as the crowning glory. This final layer is your chance to let your creativity shine. - Chill and Serve
Let the cups sit in the fridge for at least 30 minutes before serving. This step helps the flavors come together harmoniously.
Making dessert cups doesn’t have to be complicated—it’s all about experimenting and having fun. The best part? Every cup can be customized, so everyone gets exactly what they love. Whether it’s for a family gathering or a casual weekend treat, these simple steps ensure your dessert cups will be the highlight of any occasion.
Mouthwatering Recipes
Dessert cups are a playground of creativity, where simple ingredients transform into delightful masterpieces. Each recipe is an opportunity to mix flavors, textures, and colors in one compact cup. Here are some tried-and-true recipes that will make your dessert cups the star of any gathering. Let’s explore these delicious creations one step at a time.
Decadent Chocolate Mousse Cups
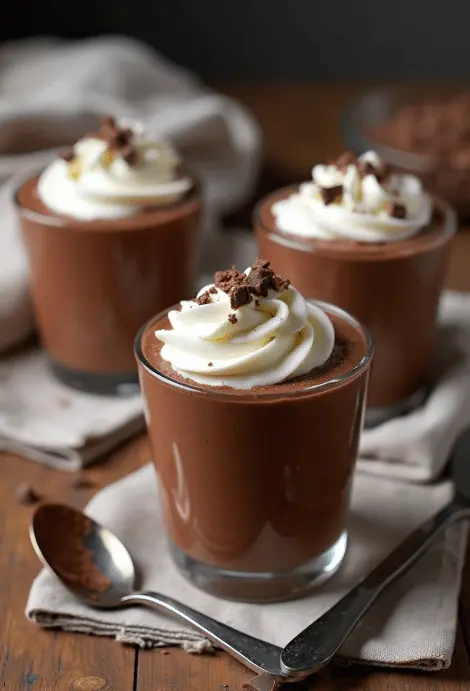
Imagine diving your spoon into a rich, velvety chocolate mousse, topped with a sprinkle of chocolate shavings and a dollop of whipped cream. These chocolate mousse cups are pure indulgence, and they’re surprisingly easy to make.
Here’s what you’ll need:
- Semi-sweet chocolate chips (1 cup)
- Heavy whipping cream (2 cups, divided)
- Sugar (2 tablespoons)
- Vanilla extract (1 teaspoon)
- Optional: Chocolate shavings or mini chocolate chips for garnish
Steps to Make It:
- Melt the chocolate chips in a heatproof bowl over simmering water or in the microwave, stirring until smooth.
- In a separate bowl, whip 1 ½ cups of heavy cream until soft peaks form, adding sugar and vanilla as you go.
- Let the melted chocolate cool slightly, then gently fold it into the whipped cream.
- Spoon or pipe the mousse into clear cups, filling each about three-quarters full.
- Chill for at least an hour. Top with whipped cream and chocolate shavings before serving.
The result is a dessert that feels like a hug in a cup—perfect for chocolate lovers of all ages.
Dreamy Cheesecake in a Cup
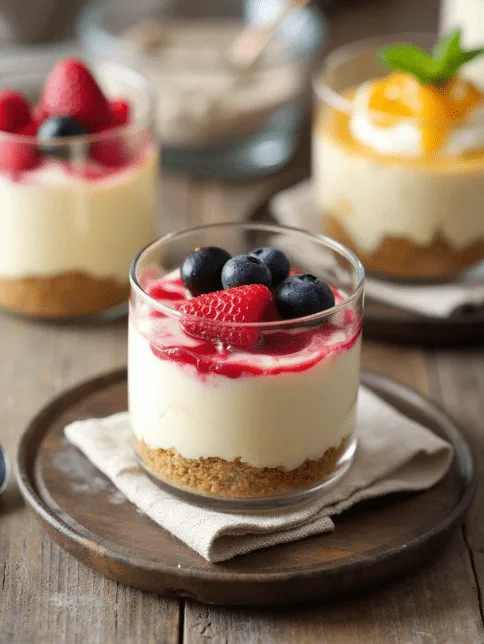
Cheesecake in a cup combines all the creamy, tangy goodness of traditional cheesecake with the ease of no-bake preparation. Plus, it’s endlessly customizable!
Here’s your ingredient list:
- Graham cracker crumbs (1 cup)
- Unsalted butter (4 tablespoons, melted)
- Cream cheese (8 ounces, softened)
- Powdered sugar (½ cup)
- Vanilla extract (1 teaspoon)
- Heavy cream (½ cup)
- Optional toppings: Fresh berries, fruit preserves, or caramel drizzle
Steps to Make It:
- Mix graham cracker crumbs with melted butter and press a small layer into the bottom of each cup.
- Beat cream cheese, powdered sugar, and vanilla extract together until smooth and creamy.
- In another bowl, whip heavy cream until stiff peaks form, then gently fold it into the cream cheese mixture.
- Spoon or pipe the cheesecake filling over the crumb base, filling the cup nearly to the top.
- Chill for at least two hours before adding your favorite toppings like fresh berries or caramel drizzle.
This dessert feels like a sweet dream in every bite, and you can easily tweak it to match the flavors you love most.
Refreshing Fruit Parfait Creations
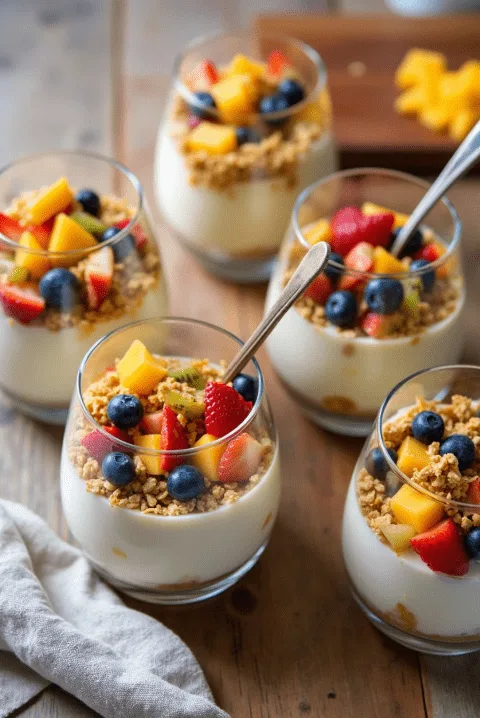
Light, colorful, and oh-so-refreshing, fruit parfait dessert cups are the ultimate crowd-pleaser. They’re also a wonderful way to use fresh, seasonal fruit.
Here’s what to gather:
- Greek yogurt or vanilla-flavored yogurt (2 cups)
- Honey or maple syrup (to taste)
- Granola (1 cup)
- Fresh fruits: Strawberries, blueberries, kiwis, or mangoes
Steps to Make It:
- Mix yogurt with a drizzle of honey or maple syrup to sweeten it slightly.
- Layer granola at the bottom of each cup, followed by a layer of yogurt.
- Add a layer of sliced or diced fresh fruit.
- Repeat the layers until the cup is full, finishing with a sprinkle of granola and a slice of fruit on top.
These parfaits are as refreshing as they are nutritious. They’re great for breakfast, dessert, or a light snack—and the kids will love making their own!
Tiramisu Cups: A Little Luxury in Every Bite
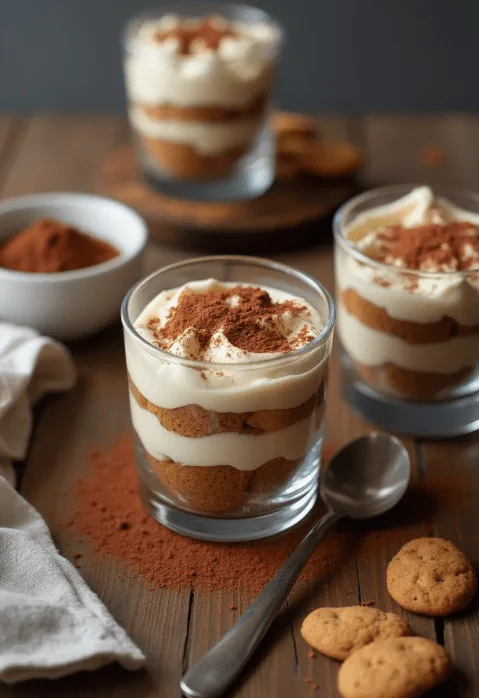
Tiramisu cups bring the classic Italian dessert into a fun, portable format. With layers of espresso-soaked ladyfingers, creamy mascarpone filling, and a dusting of cocoa, they’re the ultimate little luxury.
Here’s what you’ll need:
- Ladyfingers (about 12)
- Strong brewed coffee or espresso (½ cup, cooled)
- Mascarpone cheese (8 ounces)
- Heavy cream (1 cup)
- Sugar (3 tablespoons)
- Cocoa powder for dusting
Steps to Make It:
- Brew the coffee and let it cool. Dip ladyfingers quickly into the coffee and place a piece at the bottom of each cup.
- Beat mascarpone cheese, heavy cream, and sugar together until fluffy.
- Layer the mascarpone mixture over the soaked ladyfingers.
- Repeat layers, ending with the mascarpone mixture. Dust the top with cocoa powder.
- Chill for at least two hours to allow the flavors to meld beautifully.
Every bite of these tiramisu cups feels like a trip to Italy. They’re elegant, rich, and guaranteed to impress.
With these recipes, you can cater to every craving, from rich chocolate to fruity freshness and everything in between. Ready to grab your spoons? Let’s start crafting these delightful desserts!
Make It Yours: Customizing Dessert Cups
Dessert cups are all about personalization. Whether you’re celebrating a holiday, catering to dietary needs, or simply adding your signature flair, customization is the magic that makes dessert cups unforgettable. With just a few thoughtful choices, you can turn a simple recipe into something truly extraordinary. Let’s explore how you can make your dessert cups uniquely yours.
Seasonal Ingredients for a Festive Touch
Every season has its special flavors, and incorporating them into your dessert cups is a great way to add a festive twist. Imagine the warm spices of autumn, the bright citrus of winter, the freshness of spring, or the juicy fruits of summer—all packed into one delicious cup.
In the fall, think of layers with pumpkin mousse, crushed ginger snaps, and a sprinkle of cinnamon. Top it with whipped cream and a dash of nutmeg for a cozy, spiced treat. Winter calls for peppermint chocolate cups, with layers of chocolate pudding, crushed candy canes, and a peppermint whipped topping. For spring, try lemon curd layered with crumbled shortbread and fresh raspberries—light, tangy, and refreshing. Summer is perfect for tropical flavors like coconut cream, pineapple chunks, and toasted coconut on top.
Seasonal desserts also make for eye-catching displays. Use colors that match the season: reds and greens for Christmas, pastels for Easter, or deep oranges and browns for Thanksgiving. It’s not just about flavor; it’s about setting the mood for your celebration.
Options for Every Diet: Gluten-Free, Vegan, and More
One of the best things about dessert cups is their flexibility. You can easily adjust recipes to fit different dietary needs without sacrificing flavor or fun. Here’s how you can make sure everyone at the table has something delicious to enjoy.
For gluten-free dessert cups, swap out cookie crumbs or cake layers with gluten-free options. Many stores now carry gluten-free graham crackers, brownies, and cookies, making it simple to create layers that everyone can eat. If you’re making a fruit parfait, granola can be replaced with gluten-free oats or crunchy nuts.
When catering to vegan guests, replace dairy-based creams and fillings with plant-based alternatives. Coconut cream, almond milk pudding, or cashew-based mascarpone are excellent substitutes that still deliver creamy, rich textures. Vegan desserts can also shine with fresh fruits, dark chocolate (check that it’s dairy-free), and simple syrups for sweetness.
For sugar-free or diabetic-friendly options, focus on natural sweeteners like stevia, monk fruit, or unsweetened fruit layers. Many brands now offer sugar-free versions of syrups and jams, which work beautifully in dessert cups.
Creating desserts that cater to different diets doesn’t have to be complicated. It’s all about finding the right swaps and being mindful of flavors. Plus, experimenting with these alternatives can lead to exciting new combinations that might become your favorites!
By tailoring your dessert cups to the seasons and your guests’ preferences, you’re not just making a dessert—you’re creating a memory. These thoughtful touches turn ordinary treats into something truly special. Ready to make it your own? Let the creativity flow!
Serving with Style
Dessert cups are as much about presentation as they are about taste. When served with a touch of creativity, they can turn any table into a work of art. From the choice of the cup to the finishing touches, every detail matters. Let’s explore how you can serve your dessert cups with flair and keep them fresh until the moment they’re ready to shine.
Choosing the Perfect Cup or Jar
The container you choose for your dessert cups sets the stage for the experience. Consider it the foundation for your masterpiece. While any small cup or jar can work, the right choice can elevate your dessert to the next level.
Clear cups are always a winner because they showcase those beautiful layers you’ve worked hard to create. Glass jars, like mason jars, add a rustic charm that’s perfect for casual gatherings or outdoor events. For a more elegant touch, try stemless wine glasses or small crystal bowls.
If you’re hosting a kid-friendly event, opt for colorful plastic cups or themed containers. They’re lightweight, safe, and add a playful vibe to the table. Mini dessert cups with built-in spoons are also a fantastic choice for convenience.
No matter what container you pick, make sure it’s the right size—small enough to keep portions manageable but big enough to hold all your layers. A dessert cup that looks appealing and fits comfortably in hand is always a hit.
Presentation Tips to Wow Your Guests
Once you’ve chosen the perfect cup, it’s time to make your dessert cups visually irresistible. The secret? A mix of colors, textures, and thoughtful details.
- Layer Neatly: Use a piping bag or spoon to layer ingredients evenly. Clean, distinct layers make the dessert look professional and inviting.
- Add a Garnish: A garnish can take your dessert to the next level. Think fresh fruit slices, chocolate shavings, mint leaves, or a drizzle of caramel on top.
- Play with Height: Use taller cups for dramatic layering or shorter ones for a compact, cute look.
- Coordinate Colors: Match the dessert cup’s colors with the theme of your event. Bright fruits for summer, deep chocolates for winter, or pastel shades for spring celebrations.
- Accessorize: Add small decorative elements like ribbons tied around jars, tags with the flavor names, or tiny edible flowers for an elegant touch.
Your guests eat with their eyes first, so a beautifully presented dessert cup will always leave them impressed before they even take a bite.
Storing Dessert Cups for Freshness
One of the best things about dessert cups is that they can be prepared ahead of time, making party prep so much easier. However, keeping them fresh until serving time is key to ensuring every bite is just as delicious as the first.
- Cover Them Up: Use plastic wrap or lids to keep air out and prevent the dessert from drying out or absorbing other fridge odors.
- Keep Them Cool: Most dessert cups need to be refrigerated, especially those with whipped cream, mousse, or fruit. Store them at the right temperature until it’s time to serve.
- Avoid Overloading: Stack cups carefully if you’re short on fridge space. Use a tray to keep them stable and prevent tipping.
- Add Toppings Later: Save garnishes like fresh fruits or crunchy elements for just before serving. This keeps them from wilting or losing their crunch.
By storing them properly, you can prepare dessert cups a day or two in advance, leaving you stress-free on the day of your event. Plus, a little extra chill time often enhances the flavors, making them even better.
Serving dessert cups isn’t just about feeding your guests—it’s about creating a moment of joy. With the right cup, a bit of creativity in presentation, and careful storage, you’ll turn a simple dessert into something unforgettable. Ready to wow everyone? It’s time to serve with style!
FAQs About Dessert Cups
What is a Dessert Cup?
A dessert cup is an individually portioned treat layered with ingredients like cake, cream, fruits, or toppings in a clear container. They’re versatile, visually appealing, and perfect for any event.
What is the dessert that is layered in a glass bowl?
The dessert layered in a glass bowl is called a trifle, a traditional English treat with cake, custard, whipped cream, and fruits. Dessert cups are smaller, individual versions of trifles.
How many mini desserts for 30 people?
Plan for 1.5 to 2 mini desserts per person. For 30 guests, make 45–60 dessert cups to ensure everyone gets enough and can try different flavors.
Sweet Pairings to Elevate Your Dessert Cups
Your Dessert Cups deserve some delicious company! Why not add a touch of sparkle with the gorgeous Crystal Candy? It’s a treat for both the eyes and the taste buds. Or, if you’re in the mood for something dreamy, the Cream Berry Fairy Recipe is a perfect match—it’s like a bite of pure magic! For a tangy twist, try serving them with slices of the soft and delightful Kefir Sheet Cake. These pairings are sure to make your dessert table the talk of the town!
Dessert cups are proof that great things come in small packages. They’re versatile, easy to make, and a guaranteed way to bring smiles to the table. Whether you’re whipping up a quick treat for your family or impressing guests at a party, dessert cups are the perfect way to combine flavor, fun, and creativity. So, let your imagination run wild, and start creating your own sweet masterpieces today!

