Tuna Helper has been making mealtime easier and tastier for families for decades. It’s a simple meal kit that turns an ordinary can of tuna into something warm, creamy, and delicious. Whether you’re looking for a quick Lunch, a budget-friendly option, or a dish the whole family will enjoy, Tuna Helper has got you covered.
This guide will show you everything you need to know about Tuna Helper. From the different types available to creative ways to prepare it, you’ll learn how to make this classic dish even better. Whether you’re a first-time cook or a busy parent, Tuna Helper is here to save the day.
What is Tuna Helper?
Tuna Helper is a simple yet brilliant meal kit designed to help people turn an ordinary can of tuna into a delicious, hearty dish. It comes with a mix of seasonings, pasta, and instructions, making it easy for anyone—even beginner cooks—to whip up a comforting dinner in no time. But how did this idea come about, and why has it stuck around for so long?
The Origin of Tuna Helper
Let’s take a trip back to 1972, the year Tuna Helper made its debut. During this time, busy families were looking for meals that were quick to prepare but still filling and tasty. Boxed meal kits were just becoming a trend, and Tuna Helper fit right in. It gave people an affordable way to stretch simple ingredients, like canned tuna, into a meal big enough to feed the whole family.
The timing was perfect. Canned tuna was already a household favorite because it was cheap, healthy, and easy to store. Tuna Helper added that extra magic—turning plain tuna into creamy casseroles or savory pasta dishes with almost no effort. Families were hooked from the start.
Why It Became a Household Favorite
This meal kit didn’t just become popular—it became a lifesaver for many families. Here’s why:
- Super Quick and Easy: Anyone can make it. Just add a can of tuna, some milk, and maybe a little butter, and you’ve got a complete meal ready in about 20 minutes.
- Budget-Friendly: It costs just a few dollars per box, making it a go-to choice for families watching their wallets.
- Delicious Variety: From the classic Tuna Noodle to Cheesy Pasta, the flavors are comforting and satisfying.
- Pantry Staple: The boxed kit and canned tuna both last a long time, so you can always keep them on hand for busy days or unexpected guests.
- Kid-Friendly: Kids love the creamy sauces and soft pasta. It’s one of those meals that even picky eaters enjoy.
Imagine this: A mom comes home after a long day at work. She’s exhausted, the kids are hungry, and she doesn’t want to spend hours in the kitchen. She grabs a box, boils some water, stirs everything together, and voilà—dinner is served. This is the story behind its popularity. It’s not just a meal; it’s a solution.
Families around the world have shared memories of gathering around the table with this comforting dish at the center. It’s simple, warm, and satisfying—like a little hug in a bowl. Whether it’s your first time trying it or your hundredth, it continues to make dinner feel special without the hassle.
How to Prepare Tuna Helper

Preparing Tuna Helper is as simple as it gets, but there’s something magical about turning a few basic ingredients into a warm, satisfying meal. Whether it’s your first time cooking Tuna Helper or you’re a seasoned pro, following the steps carefully ensures a perfect dish every time. Plus, with a few extra tips, you can make it even better.
Step-by-Step Instructions: From Box to Plate
Making Tuna Helper is a breeze, but let’s break it down step by step so you can follow along easily. Picture yourself in the kitchen, ready to create something delicious in just a few simple moves:
- Gather Your Ingredients
- A box of Tuna Helper (any flavor you like).
- A can of tuna (usually 5-6 ounces).
- Water, milk, and butter (check the box for exact measurements).
- Cook the Pasta
- Start by boiling water in a large pan. Once it’s bubbling, add the pasta from the Tuna Helper kit.
- Let it cook until the noodles are tender. Stir occasionally so the pasta doesn’t stick to the bottom of the pot.
- Add the Tuna and Sauce
- Drain your cooked pasta, but leave a little water in the pan to keep things creamy.
- Stir in the sauce mix from the box, along with milk, butter, and your canned tuna. Break up the tuna into smaller chunks for even mixing.
- Simmer to Perfection
- Reduce the heat to low and let everything simmer together. Stir gently so the flavors blend beautifully, and the sauce thickens into a creamy, dreamy consistency.
- Serve and Enjoy!
- Turn off the heat and let the dish sit for a minute to cool slightly. Then, scoop it onto plates or bowls and enjoy your homemade Tuna Helper masterpiece.
Essential Ingredients You Need
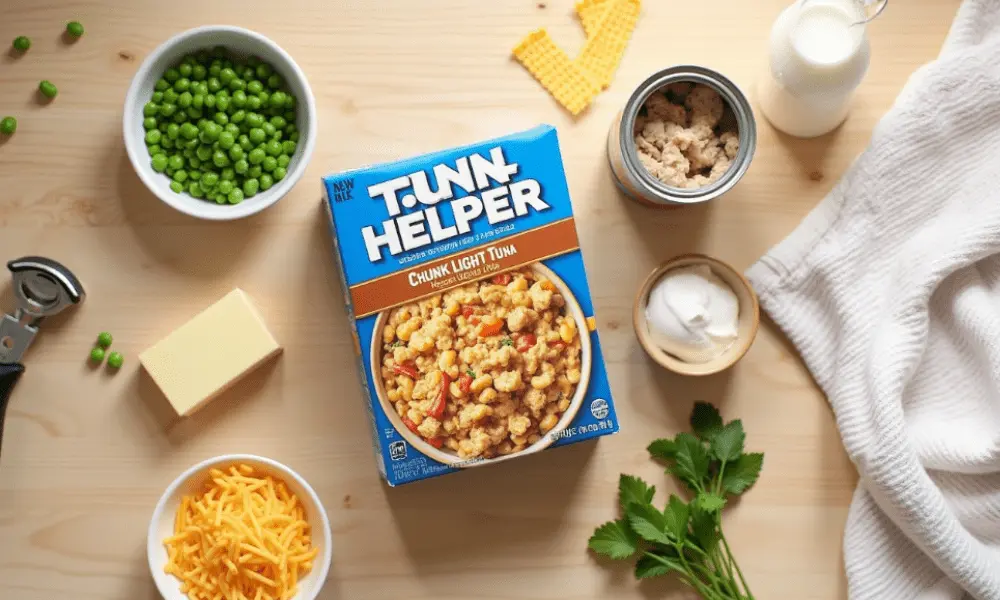
Tuna Helper’s beauty lies in its simplicity. You don’t need a long list of ingredients to make a delicious meal. Here’s everything you’ll need:
- Tuna Helper Mix: The star of the show, with its seasoning and pasta ready to go.
- Canned Tuna: Go for chunk light or solid white tuna, depending on your preference.
- Milk and Butter: These make the sauce rich and creamy.
- Optional Add-Ons: Want to elevate your meal? Toss in frozen peas, shredded cheese, or a sprinkle of fresh herbs.
The great thing is that most of these ingredients are pantry staples, so you don’t have to run out to the store every time you’re craving Tuna Helper.
Tips for First-Time Cooks
If this is your first time making Tuna Helper, don’t worry—it’s nearly foolproof! But here are a few tips to make sure your meal turns out perfect:
- Read the Instructions First: Before you even open the box, take a minute to read the instructions. This will save you from any surprises while cooking.
- Use a Non-Stick Pan: A good pan can make all the difference. Non-stick pans ensure your pasta doesn’t stick, and cleanup is easier too.
- Don’t Overcook the Pasta: Keep an eye on the noodles as they boil. Overcooked pasta can get mushy, and you want them just right—soft but still firm.
- Taste as You Go: Before serving, give the dish a little taste. You can adjust the seasonings if needed. Maybe a pinch of salt or a dash of pepper will take it to the next level.
- Make It Your Own: Don’t be afraid to get creative. Add vegetables like broccoli or carrots, sprinkle some cheese on top, or even toss in some hot sauce if you like a kick of heat.
Imagine this: It’s a chilly evening, and you’ve just finished cooking your first batch of Tuna Helper. The kitchen smells amazing, and your family is gathered around the table, ready to dig in. As you take your first bite, you feel proud—it’s simple, it’s delicious, and you made it all on your own. That’s the magic of Tuna Helper!
Tuna Helper Recipes and Variations
Tuna Helper is already tasty right out of the box, but what if you want to switch things up and make it your own? With a little creativity, you can turn this classic meal into something truly special. Here are some easy and fun recipe ideas to try at home.
1. Tuna Helper Casserole

Transform your Tuna Helper into a warm and bubbly casserole that feels extra fancy but is still super simple to make.
- What You’ll Need:
- 1 box of Tuna Helper (any flavor)
- 1 can of tuna
- 1 cup of shredded cheese (cheddar works great)
- ½ cup of breadcrumbs
- Optional: frozen peas or chopped broccoli
- How to Make It:
- Prepare the Tuna Helper as you normally would, following the instructions on the box.
- Stir in some frozen peas or chopped broccoli for a boost of veggies.
- Pour the mixture into a greased casserole dish.
- Sprinkle the shredded cheese evenly over the top.
- Add a layer of breadcrumbs for extra crunch.
- Bake at 375°F (190°C) for about 15 minutes, or until the top is golden and bubbly.
- Serve and enjoy the comforting, oven-baked goodness!
This recipe is perfect for family dinners or when you want leftovers that taste just as good the next day.
2. Spicy Tuna Helper
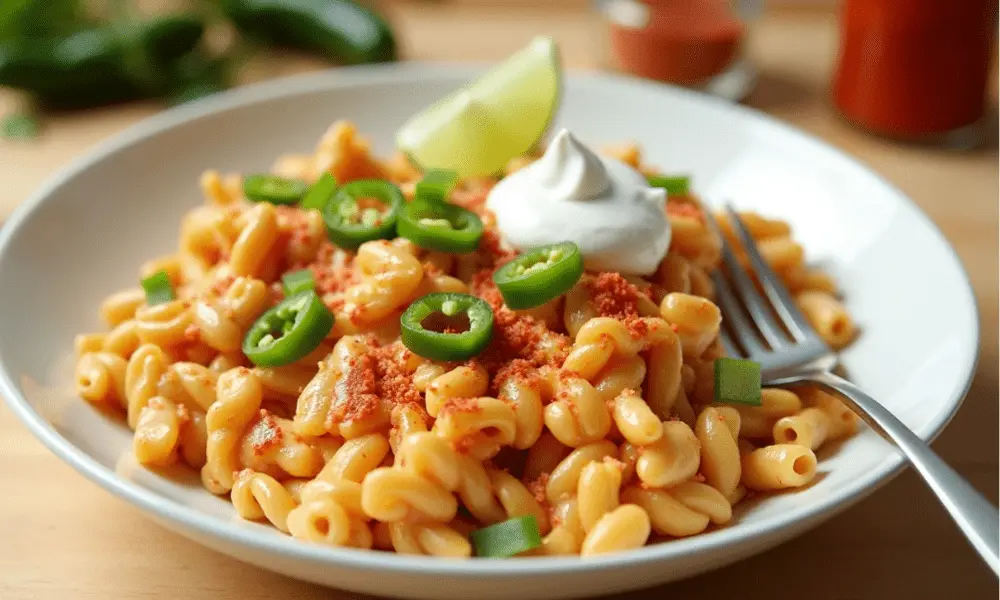
For those who like a little heat, this spicy twist on Tuna Helper will hit the spot.
- What You’ll Need:
- 1 box of Tuna Helper (Cheesy Pasta works well)
- 1 can of tuna
- 1 tablespoon of hot sauce (adjust to taste)
- ½ teaspoon of crushed red pepper flakes
- Optional: diced jalapeños or a sprinkle of cayenne pepper
- How to Make It:
- Prepare the Tuna Helper according to the box instructions.
- Stir in the hot sauce and crushed red pepper flakes while the dish simmers.
- If you’re feeling bold, add diced jalapeños or a pinch of cayenne pepper for extra kick.
- Serve it with a dollop of sour cream or a squeeze of lime to balance the heat.
This spicy variation is a fun way to give Tuna Helper a new personality. It’s perfect for adults who want something a little more exciting at dinner.
3. Dairy-Free Tuna Helper Recipe

For those avoiding dairy, you can still enjoy a creamy, comforting version of Tuna Helper with a few easy swaps.
- What You’ll Need:
- 1 box of Tuna Helper (look for a dairy-free flavor or make your own pasta)
- 1 can of tuna
- 1 cup of unsweetened almond milk or oat milk
- 2 tablespoons of dairy-free butter or olive oil
- Optional: nutritional yeast for a cheesy flavor
- How to Make It:
- Cook the pasta from the Tuna Helper kit, just as you normally would.
- In a separate pan, melt the dairy-free butter and mix it with the seasoning packet from the box. Stir in the almond or oat milk to create a creamy sauce.
- Combine the sauce, pasta, and tuna in the pan. Stir well and let it simmer for a few minutes.
- Sprinkle nutritional yeast on top for a cheesy taste without the dairy.
This recipe is great for anyone with dietary restrictions, and the flavor is so good that even those who aren’t dairy-free will enjoy it.
These simple recipes prove that Tuna Helper is much more than just a meal in a box. With a little imagination and a few extra ingredients, you can create dishes that suit your taste and make dinner time feel a little extra special.
FAQs
1. Can I use fresh tuna instead of canned tuna in Tuna Helper?
Yes, you can! Using fresh tuna adds a slightly different flavor and texture. Just cook the fresh tuna first, flake it into small pieces, and mix it in when the recipe calls for canned tuna. It’s a great way to upgrade the dish if you have fresh fish on hand.
2. What can I add to Tuna Helper to make it healthier?
You can add vegetables like peas, broccoli, or carrots to make it more nutritious. These veggies cook quickly and mix well with the creamy sauce. You can also use low-fat milk and butter alternatives to reduce calories while keeping the flavor.
3. How do I store leftovers from Tuna Helper?
Leftovers can be stored in an airtight container in the refrigerator for up to 3 days. To reheat, just warm it up in the microwave or on the stove with a splash of milk to keep it creamy. It’s perfect for quick lunches or snacks the next day!
Exploring More Delicious Options with Tuna Helper
To expand your culinary adventures, you might enjoy trying recipes like our Beef Sausage Guide for a hearty meal or exploring the vibrant flavors of Purple Sweet Potato Recipes for unique side dishes. Additionally, our Chocolate-Covered Almonds Recipe offers a delightful dessert idea to round out your meal. These options complement Tuna Helper’s versatility, giving you an array of delicious inspirations for any occasion.
Tuna Helper has been making mealtime easier and tastier for families for decades. It’s a simple meal kit that turns an ordinary can of tuna into something warm, creamy, and delicious. Whether you’re looking for a quick dinner, a budget-friendly option, or a dish the whole family will enjoy, Tuna Helper has got you covered.
This guide will show you everything you need to know about Tuna Helper. From the different types available to creative ways to prepare it, you’ll learn how to make this classic dish even better. Whether you’re a first-time cook or a busy parent, Tuna Helper is here to save the day.

